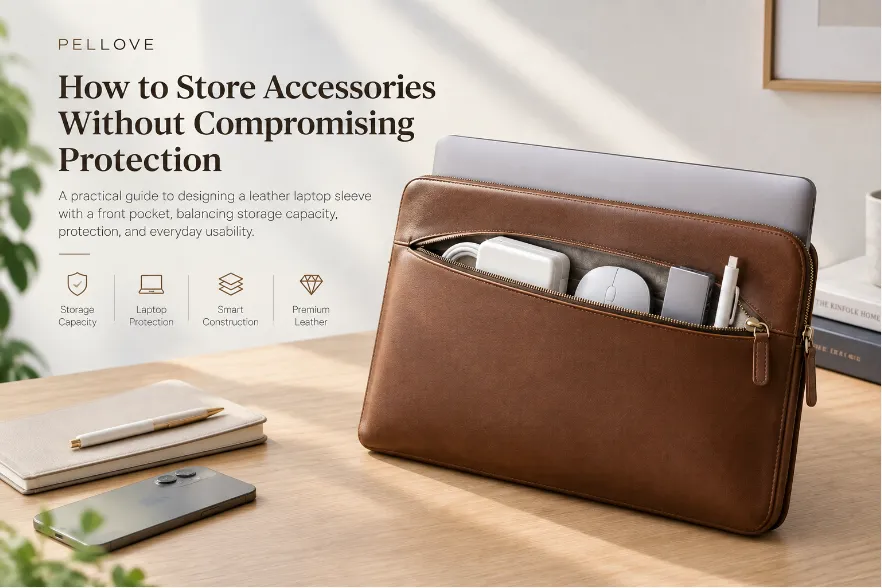

A laptop sleeve with a front pocket lets you carry chargers, cables, a mouse, USB hubs, documents, and other everyday accessories with your laptop.
But a front pocket is more than an extra storage compartment.
Once you add accessories, they change the sleeve’s thickness, weight, shape, and how pressure is distributed. A rigid power adapter can create a concentrated contact area, while a mouse, USB hub, or bundled cable can change the pocket profile as the sleeve is carried.
For a custom leather laptop sleeve, the pocket should therefore be developed as part of the complete product construction rather than simply added to the outside of an existing sleeve.
A simplified construction can be viewed as:
Accessory → Front Pocket → Structural Separation → Laptop Compartment → Lining → Laptop
The right design balances storage capacity, laptop protection, overall thickness, durability, and everyday usability.
1. Why Add a Front Pocket to a Laptop Sleeve?
The main advantage of a front pocket is convenience. Users can keep frequently needed accessories with their laptop instead of carrying a separate pouch.
Depending on the intended use, a front pocket may hold:
- Charging cables
- Power adapters
- Computer mice
- USB hubs
- External drives
- Styluses
- Earphones
- Documents or notebooks
- Other small accessories
These items have very different physical characteristics.
A cable is flexible and relatively flat. A power adapter is rigid and comparatively thick. A USB hub may have hard edges or connectors, while a mouse has a three-dimensional shape.
That difference should be considered before the pocket dimensions are finalized.
The intended accessories can affect:
- Pocket width and height
- Pocket depth
- Gusset design
- Opening size
- Internal divisions
- Reinforcement
- Lining
- Closure
- Overall sleeve thickness
A pocket that looks appropriately sized when empty may become difficult to close or unnecessarily bulky once it is loaded.
2. How Does a Front Pocket Affect Laptop Protection?
A front pocket does not automatically reduce laptop protection. What matters is how the loaded pocket interacts with the laptop compartment.
Localized Pressure vs. Distributed Pressure
Accessories do not apply pressure in the same way.
A document or thin notebook distributes contact over a relatively broad area. A rigid power adapter, metal USB hub, or hard connector may contact the pocket over a much smaller area.
This can create a localized pressure point.
Accessory weight and pressure distribution are not the same thing. Load transfer depends on factors such as:
- Accessory rigidity
- Contact area
- Accessory orientation
- Pocket position
- Structural separation
- Overall layer construction
If the separation between the front pocket and laptop compartment is insufficient, a rigid accessory may transfer concentrated pressure toward the laptop.
Simply using thicker leather is not necessarily the most effective solution.
Depending on the product requirements, separation can be created through a combination of:
- A dedicated pocket wall
- Reinforcement
- Controlled spacing
- A structured gusset
- Different material stiffness
- Appropriate layer construction
For example:
Outer Leather → Reinforcement → Lining → Accessory
The laptop compartment can have its own independent construction.
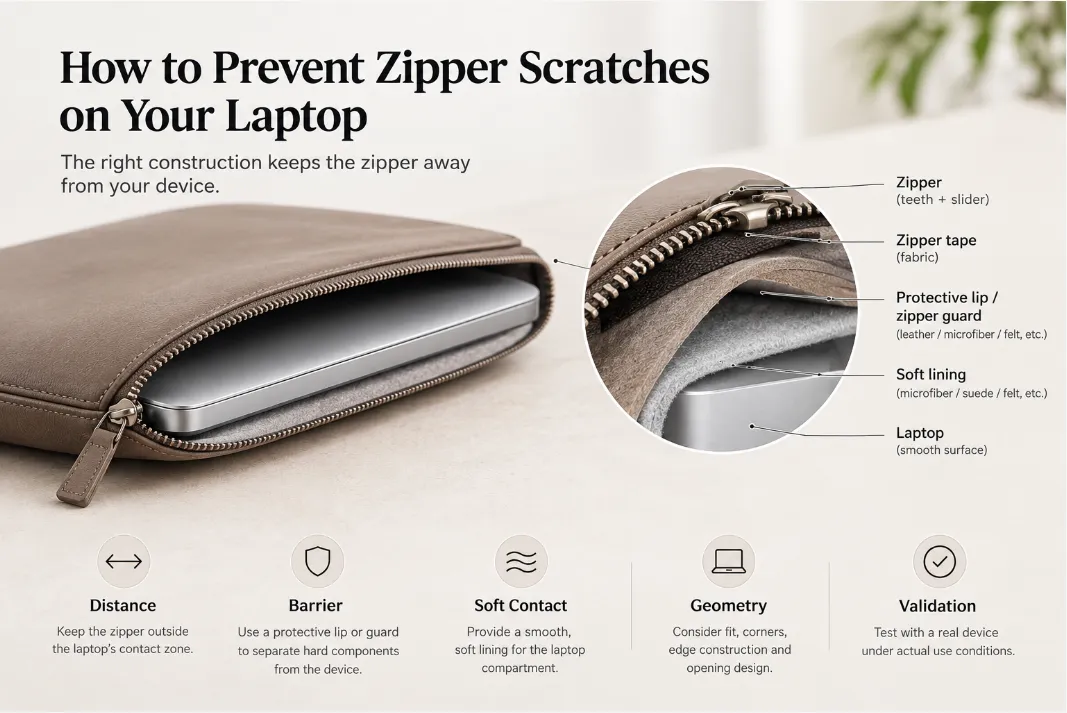
Particular attention should be paid to power adapters, metal hubs, hard connectors, zipper pulls, snaps, magnets, and other rigid components.
For a broader discussion of sleeve protection, see How Much Protection Does a Leather Laptop Sleeve Really Provide?
3. How Deep Should a Laptop Sleeve Front Pocket Be?
Pocket depth depends on the size, shape, and quantity of the accessories the pocket is designed to carry.
| Target Accessory | Typical Profile | Suitable Pocket Approach |
|---|---|---|
| Cables and small accessories | Low | Flat or shallow |
| Mouse and cables | Medium | Moderate-depth |
| Power adapter | High | Structured or gusseted |
| Multiple accessories | Variable | Divided or expandable |
A shallow pocket helps maintain a slim profile and works well for flat accessories.
A deeper pocket provides more capacity, but excessive depth can allow contents to move around and increase the sleeve’s loaded profile.
Nominal Depth vs. Usable Depth
The dimension shown on a flat pattern is not necessarily the usable finished space.
Folds, seams, gussets, reinforcement, edge construction, and closures can all reduce the actual storage area.
For this reason, pocket capacity should be evaluated on the finished sample, not only from pattern dimensions.
Empty vs. Loaded Condition
A pocket should be checked both empty and loaded.
Consider:
- Empty sleeve thickness
- Typical loaded thickness
- Maximum intended loaded thickness
- Accessory movement
- Clearance from the laptop compartment
A sleeve may look very slim with an empty pocket but become substantially thicker once a power adapter, mouse, or other bulky accessory is inserted.
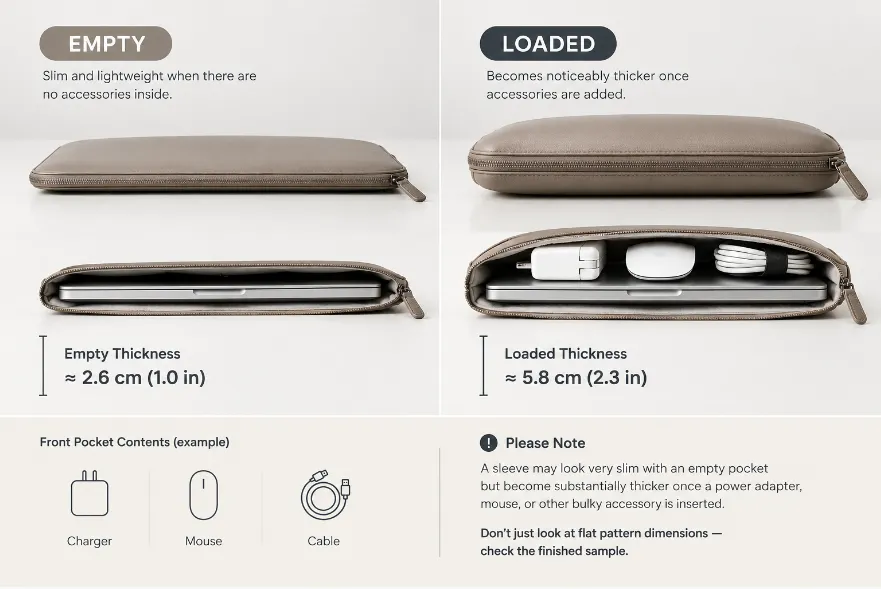
Empty vs loaded
4. Flat, Gusseted, or Structured: Which Pocket Construction Should You Choose?
The pocket construction should match the accessories it is expected to carry.
| Pocket Type | Capacity | Profile | Structure | Typical Use |
|---|---|---|---|---|
| Flat | Low | Slim | Simple | Cables, documents |
| Gusseted | Medium–High | Moderate | Flexible | Mouse, charger, cables |
| Structured | High | Thicker | Strong | Multiple or heavier accessories |
Flat Pocket
A flat pocket uses relatively little material and adds minimal thickness.
It works well for documents, cables, cards, and other thin accessories.
Its main limitation is expansion. Bulky accessories can distort the pocket or make the sleeve difficult to close.
Gusseted Pocket
A gusset allows the pocket to expand as accessories are inserted.
It is useful for power adapters, computer mice, multiple cables, and mixed-size accessories.
The trade-off is additional material, folds, seams, and assembly requirements.
Structured Pocket
A structured pocket uses additional reinforcement or a defined layer construction to help maintain its shape under load.
It is better suited to heavier or bulkier accessories, but more structure also means:
- Greater thickness
- Higher material consumption
- More weight
- More complex construction
- Potentially higher production cost
For a slim premium leather sleeve, controlled structure is often more practical than maximum reinforcement.
5. How Much Reinforcement Does a Front Pocket Need?
A front pocket does not necessarily need the same level of reinforcement across its entire surface.
Areas exposed to repeated or concentrated stress usually deserve more attention, including:
- Pocket opening
- Lower corners
- Gusset attachments
- Stitching areas
- Zipper ends
- Hardware attachment points
- Areas exposed to repeated contact with rigid accessories
A useful design principle is:
Reinforce where stress occurs rather than making the entire pocket equally thick.
This can help balance durability with flexibility, weight, thickness, material consumption, and production cost.
Leather Thickness Is Not the Same as Structural Strength
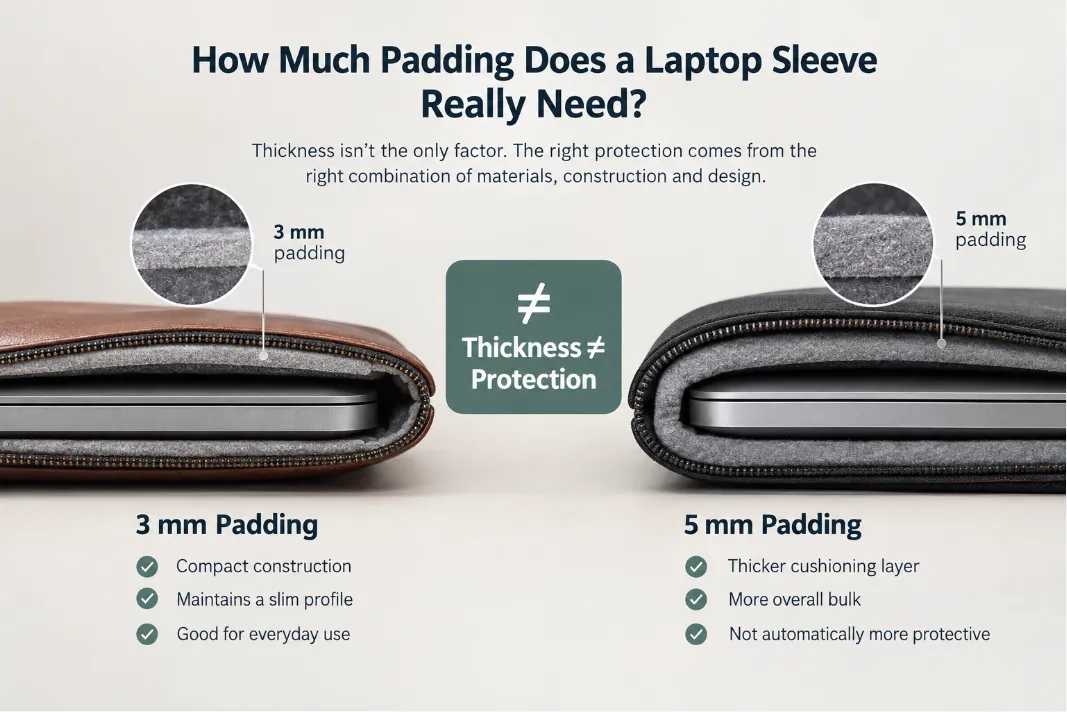
Thicker leather does not automatically create a stronger or more protective sleeve.
Performance depends on the interaction between:
- Leather
- Reinforcement
- Adhesive
- Lining
- Skiving
- Folding
- Stitching
- Overall construction
For example, overlapping areas may be skived to control bulk, while corners or attachment points receive additional support.
The finished product does not need to have the same thickness everywhere.
For a slim design, the aim is controlled reinforcement, not maximum thickness.
See How to Design a Slim Leather Laptop Sleeve Without Sacrificing Protection for more on balancing slimness and structural performance.
6. How Do Leather, Lining, and Hardware Affect the Pocket?
The front pocket does not always need exactly the same material construction as the laptop compartment. Each component serves a different function.
Leather: Flexibility and Structure
Leather influences the pocket’s flexibility, shape retention, appearance, and hand feel.
Softer leather can provide a more flexible and premium feel, but the opening, corners, and hardware attachment areas may need additional support.
More structured leather can improve shape retention, although excessive stiffness can make folding, skiving, and assembly more difficult.
Lining: Surface Protection and Hand Feel
Common lining options include:
- Microfiber
- Felt
- Synthetic suede
- Textile fabrics
A lining can reduce friction, protect accessory surfaces, and improve the hand feel of the pocket.
However, lining is not the same as cushioning.
A soft microfiber or suede lining should not automatically be considered an impact-protection layer. If additional separation or impact resistance is required, the appropriate structural layer should be incorporated into the construction.
See Leather Laptop Sleeve Lining: Microfiber, Felt & Other Options for a detailed comparison of lining materials.
Hardware: Function and Contact Points
Zippers, snaps, magnets, and metal logos can create rigid contact areas.
If hardware can press toward the laptop compartment, possible solutions include:
- Repositioning the hardware
- Covering the contact area with leather or textile
- Increasing structural separation
- Adding local reinforcement
- Adjusting the layer construction
Hardware placement is therefore part of the overall construction, not only an aesthetic decision.
7. How Should a Front Pocket Affect Laptop Sleeve Dimensions?
Adding a front pocket does not necessarily mean increasing the entire sleeve proportionally.
The two areas should be developed according to different requirements:
Laptop compartment → actual laptop dimensions
Front pocket → actual accessory dimensions
Use Actual Laptop Dimensions, Not Just Screen Size
Screen size alone is not enough to determine sleeve dimensions.
Two laptops with the same nominal screen size can have different:
- Length
- Width
- Thickness
- Corner geometry
- Hinge configurations
The laptop compartment should be based on the actual device dimensions and required clearance.
The front pocket should be based on the actual accessories.
Important dimensions include:
- Laptop width
- Laptop height
- Laptop thickness
- Pocket width and height
- Pocket depth
- Required clearance
- Maximum intended accessory size
- Accessory movement
An oversized pocket may add unnecessary bulk when the user is carrying only a cable or mouse.
For more information on laptop fit, see How to Choose the Right Laptop Sleeve Size.
8. Can a Laptop Sleeve Carry a Charger in the Front Pocket?
Yes, but the pocket should be designed around the actual charger rather than a generic assumed size.
A power adapter is generally more rigid, thicker, and heavier than a cable. Its shape can also create a concentrated contact area.
When designing a laptop sleeve with a charger pocket, consider:
- Adapter length
- Width
- Thickness
- Weight
- Surface hardness
- Connector shape
- Cable configuration
A compact charger may work in a relatively flat pocket, while a larger adapter combined with cables may require a gusseted or structured construction.
The charger should fit without creating excessive bulk, interfering with closure, or reducing the clearance around the laptop compartment.
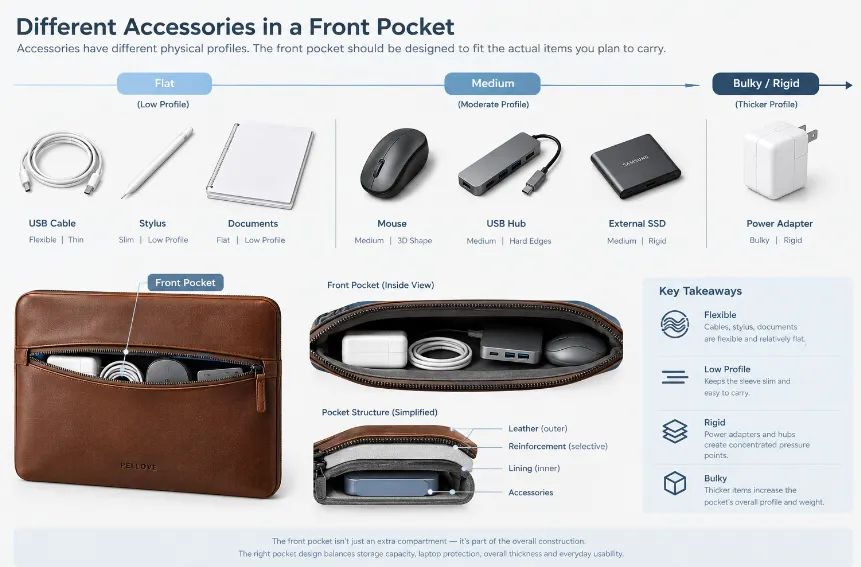
Different Accessories in a front pocket
9. How Should a Laptop Sleeve With a Front Pocket Be Tested?
A functional prototype should be evaluated with the actual laptop and representative accessories whenever possible.
Empty Test
Check:
- Overall appearance
- Pocket shape
- Sleeve profile
- Opening
- Closure
- Edge construction
- Hardware position
Typical Load Test
Use the accessories users are expected to carry regularly.
Evaluate:
- Capacity
- Ease of insertion and removal
- Accessory position
- Closure
- Loaded thickness
- Pocket deformation
- Carrying comfort
Maximum Intended Load Check
Test the maximum load the product is designed to carry.
Look for:
- Excessive deformation
- Localized pressure
- Seam stress
- Excessive thickness
- Closure problems
- Reduced laptop clearance
Repeated Loading Test
Repeatedly insert and remove the intended accessories to evaluate:
- Pocket opening
- Stitching
- Gussets
- Zipper ends
- Edge construction
- Leather deformation
- Reinforcement
- Hardware attachment
An empty sample can look excellent while performing poorly when loaded. Testing the finished sample with realistic accessories provides a much better indication of everyday performance.
10. Common Front Pocket Design Problems
| Problem | What Happens | Possible Design Direction |
|---|---|---|
| Pocket too shallow | Accessories are difficult to insert or distort the pocket | Increase usable depth or change construction |
| Pocket too deep | Contents move and increase bulk | Reduce depth or add internal divisions |
| Rigid accessory presses toward laptop | Localized pressure can develop | Improve structural separation |
| Entire pocket is over-reinforced | Sleeve becomes unnecessarily thick or rigid | Use local reinforcement |
| Pocket opening deforms | Repeated use stresses the opening | Reinforce or redesign the opening |
| Hardware creates a contact point | Rigid components may press toward the laptop | Reposition or cover the hardware |
These issues are often difficult to identify from a flat pattern alone.
A finished prototype with the intended laptop and accessories can reveal problems with capacity, clearance, thickness, deformation, and usability before bulk production.
11. What Should You Confirm With Your Manufacturer Before Sampling?
For custom OEM/ODM development, the front pocket should be developed together with the rest of the sleeve rather than added after the main construction has been finalized.
Before sampling, confirm the following.
Laptop
- Exact laptop model
- Actual length, width, and thickness
- Required clearance
- Laptop compartment construction
Accessories
- Intended contents
- Dimensions
- Weight
- Rigidity
- Typical quantity
- Maximum intended quantity
Pocket Construction
- Flat, gusseted, divided, or structured construction
- Pocket dimensions
- Opening size
- Closure
- Internal separation
Materials
- Leather type
- Leather thickness
- Lining
- Reinforcement
- Adhesive
- Edge construction
- Local skiving requirements
Hardware
- Zipper
- Snap
- Magnet
- Logo hardware
- Hardware position
- Potential contact areas
Target Product Profile
- Empty thickness
- Typical loaded thickness
- Maximum intended loaded thickness
- Overall weight
- Desired flexibility
- Desired hand feel
Prototype and Testing
- Sample quantity
- Representative accessories
- Functional requirements
- Testing requirements
- Expected revision process
Providing these details before sampling gives the manufacturer enough information to develop the pocket as part of the complete sleeve construction. It also reduces the risk of discovering capacity, thickness, or clearance problems only after the prototype.
Conclusion
A front pocket changes more than the storage capacity of a laptop sleeve. Once accessories are added, they affect the product’s thickness, pressure distribution, shape, and structural behavior.
The pocket should therefore be designed around the accessories it is intended to carry, while maintaining sufficient separation from the laptop compartment.
Key considerations include:
- Accessory dimensions and rigidity
- Pocket depth and usable capacity
- Flat, gusseted, or structured construction
- Local reinforcement
- Empty and loaded profile
- Leather and lining selection
- Hardware placement
- Laptop clearance
- Functional prototype testing
For a premium leather laptop sleeve, protection and usability come from the interaction of the complete construction rather than from any single material or layer.
If you are developing a custom leather laptop sleeve with a front pocket, Pellove can support leather and lining selection, pocket construction, reinforcement, hardware placement, prototype development, and OEM/ODM production.